This is a digest article aimed to help you start prototyping your game on Tabletopia and guide you on the way from choosing the right plan to publishing your game on the platform.
Step 1: Choose a Designer Plan
Choosing the right Designer plan is the key thing when starting to make your game on Tabletopia.
Designer plans come in three variants: Basic, Indie, and Publisher:
- Basic is free and comes with 1 game with 2 setups and 200 MB of storage. It is perfect if you’re an amateur designer who needs a place to make and test their first game.
- Indie is $14.99 and comes with 5 games (5 setups each) and storage of 1000 MB. You can also use custom sounds in your games and add music boxes to enhance the game experience. If you’re a little yet established publisher, this may be the choice for you.
- Publisher is $49.97 and is an all-in plan: 10 games with 12 setups each, 5000 MB of storage and such premium objects and features, besides sounds, as 3D pieces, surfaces. The plan is perfect for professional publishers who want to make a digital version of games from their extensive catalog.
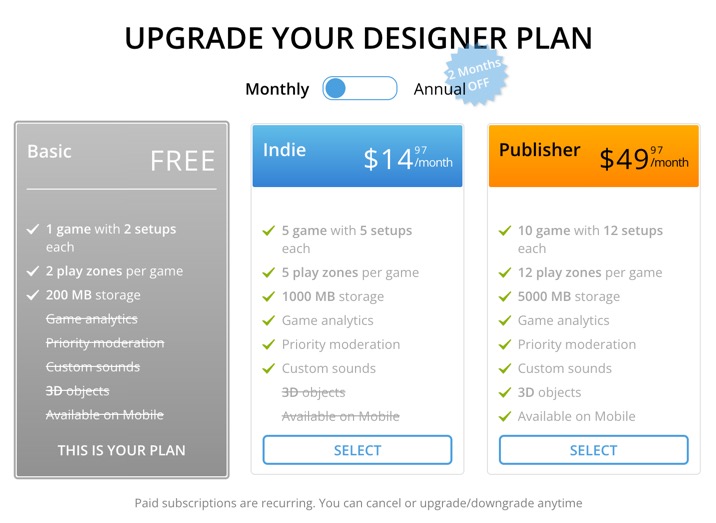
You can upgrade or downgrade at any moment. If you cancel your subscription, your games will be kept. See Tabletopia Designer Plans for details and info.
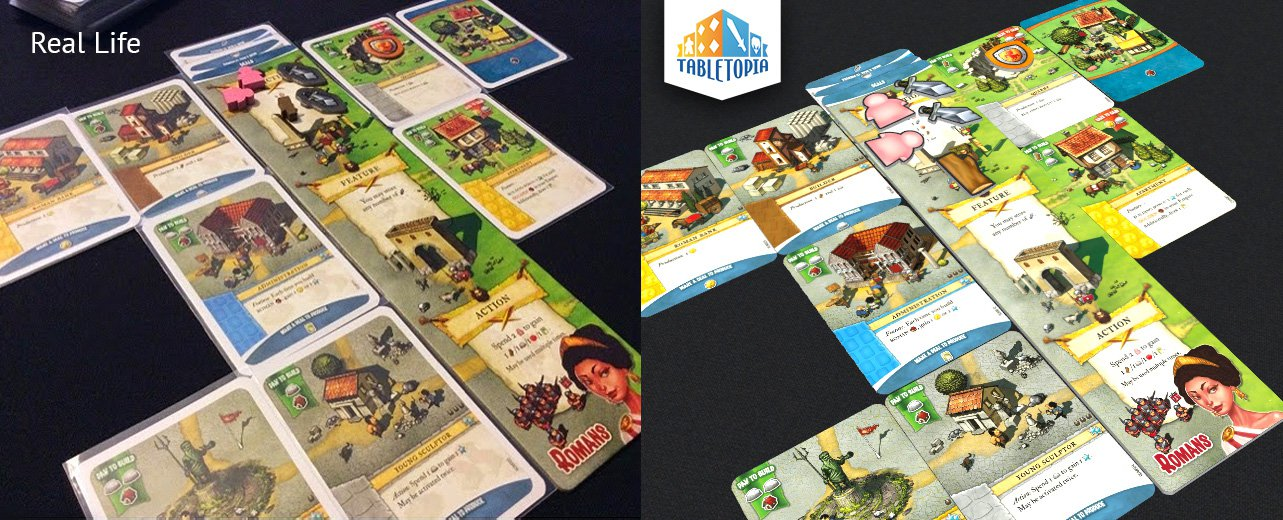
Step 2: Find Components and Prepare Graphics
Now that you have a plan with Tabletopia, you can start creating the game. Your game will start with components and graphics.
- Components. We already have an extensive library of default components you can use for your game: dice, cards, pieces, cubes, discs, pawns, etc. See Objects Catalog to learn about featured and other types of ready objects that we have for you.
- Graphics. If you have prepress or print-and-play graphics for your game ready, it will be easy to bring them to the screen. See How to Prepare Graphics for more info.
Step 3: Create the Game
- Making the game. Creating the game is described in a step-by-step way in How to Create a Game and Game Setups articles. This is very important information. You can also watch our video tutorials.
- Enhancing the game. After you’re done, we recommend using the Designer’s Checklist to make sure everything is correct. Also, consider adding some extra shine and final touches to create a special look and feel of your game, see Tips to Improve Visual Design of Your Game for suggestions.
Also see our Usability Guide for Creating Games on Tabletopia for more information.
And if you don’t have much time, we can import your game for you, see How to Import Your Game with Help of Tabletopia Team.
Step 4: Share the Game
After the game is done and looking great, it’s time to share it with other people and testers.
You can share the game privately with choice playtesters, open it to all Tabletopia users or make available to the whole wide world, whichever suits you best. Read more in Opening and Sharing Games.

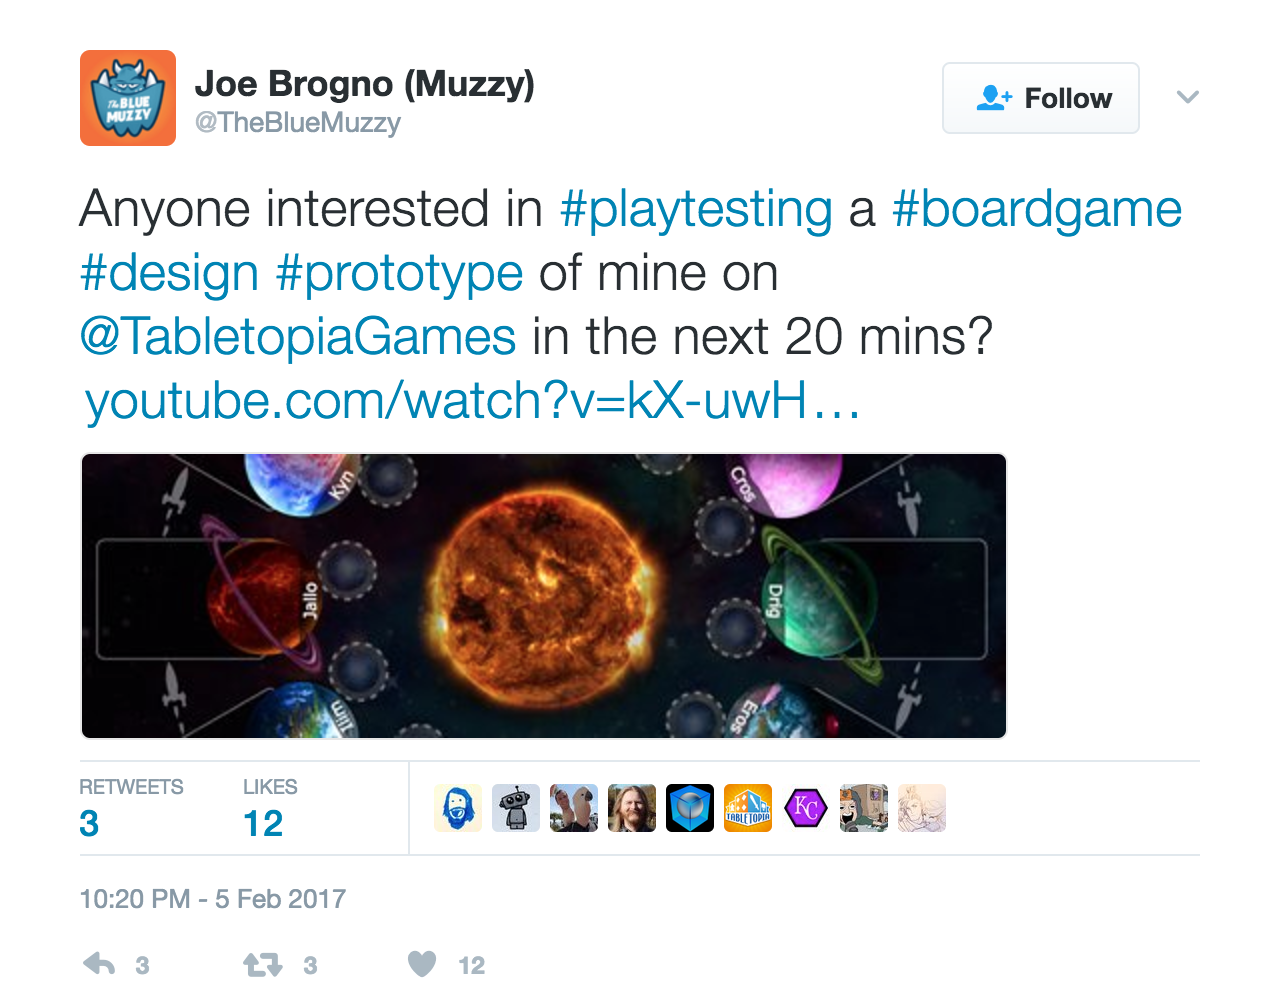
Step 5: Find Testers
Tabletopia’s greatest advantage is that you can find testers for your games literally anywhere in the world. Here are some suggestions on where to look for them:
- Tabletopia. Post a message and link to your room in the Find & Play chat to start playtesting with whoever is online and ready to play. Alternatively, you can invite players directly (create a room and click Invite in the lobby).
- Discord. Use Tabletopia’s Discord channel not only to find testers but for in-game voice communication and chat. See more in Tabletopia and Discord.
- Social media. Publish announcements about playtesting sessions on your social media to invite people around the globe. Contact us for reposts and additional promotion!
Step 6: Promote and Demonstrate the Game
After your game is playtested and polished, you can start promoting and demonstrating it in various ways.
- Kickstarter. If you’re planning to launch your game on Kickstarter, there’s a lot Tabletopia can help you with. See 5 Steps to Boost Your Kickstarter Campaign with Tabletopia for details.
- Publication on Tabletopia. Make your game available to thousands of players from all over the world. See the Licence Summary for details.
- Demonstration and promotion. Demonstrate your game to publishers and partners, or promote it before or after release to the whole world, arrange live demos, etc.