General notes
- It’s preferable to to use a Windows PC if possible
- If you prefer to watch a video than read, this is a good tutorial: https://www.youtube.com/watch?v=p3QYJdMafYE
- You can contact Administrator (info@tabletopia.com) if you have any questions
- If you need a refresher on the controls for Tabletopia, our Interacting with Game Components guide is right here
- See our previous livestreams as examples of what yours could look like!
How to use OBS to stream my game online
- Open your game on Tabletopia.
- Download and install OBS for your computer: https://obsproject.com/ It may try and do a setup wizard on first run – skip this for now.
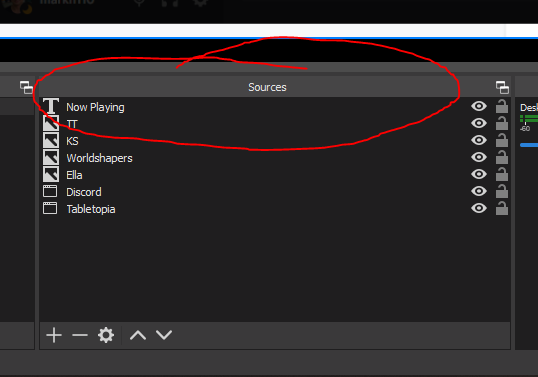
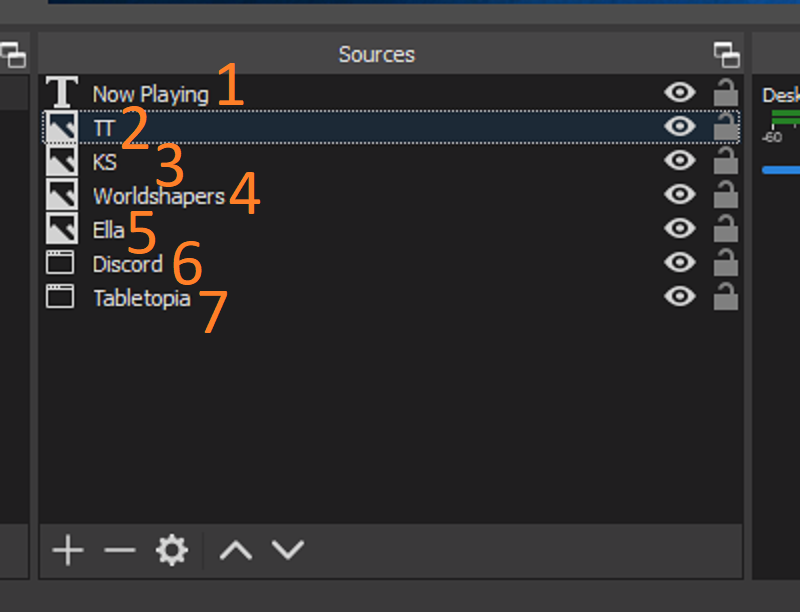
- We’re going to set up your sources. Locate the sources tab on the bottom of the screen. These dictate what is visible to your audience on the stream. When OBS first installs, it might insert some default sources – if so, click each one and press the “-” button to remove them.
- Press the “+” button and select “Window Capture”. Name it “Tabletopia”. On the next screen, drop down the “Window” menu and select the browser window that contains your Tabletopia game session. Click ok.
- Your Tabletopia game should now be visible on the main window of OBS. Click on it in OBS, and make sure the red bounding box is at least the size of the entire black box (this is what is visible to your audience). If you need to resize or move the screen to fit the black box, you can click to select, then click and drag the screen. You can also drag the red squares on any of the four corners of the red bounding box to resize.
- To crop part of a source, hold the “Alt” key while click-and-dragging on the bounding box. Example video here.
- At this point, repeat steps 4 and 5 as needed to add additional screens to your stream window (such as your webcam or logo).
- To add your webcam, select “Window Capture”, name it, then select your application (Skype, Discord, Zoom etc). Your application will only show up if the video call is already on, so do this step once you’re in the call!
- To add a static image such as a logo, instead of “Window Capture”, select “Image”
- To add text, instead of “Window Capture”, select “Text (GDI+)”
- Make sure your audio from your webcam/other people’s webcams is coming through. By default, the audio mixer will be set to “desktop audio”, and you should see the audio bars move when you talk in your mic. Anything you can hear, it should be able to hear.
- Once your image looks how you want it to, it’s time to connect to the service you’ll be streaming to. To configure your stream, click the “Settings” button on the bottom right. Click the “Stream” tab. Select the service you will use (then click “use stream key” if provided the option). Enter your provided stream key.
- If you are livestreaming with Tabletopia, our manager will provide you this shortly before your stream.
NOTE: Our livestreams are currently on hold while we update our channel (as of 27-10-21). However we encourage you to run your own and let us know – we’re happy to promote them!- If you are streaming to your own channel, look up on Google how to find your stream key for your specific service (it’s very easy!).
- If you are livestreaming with Tabletopia, our manager will provide you this shortly before your stream.
- On your service of choice, make sure you’ve titled and named what you want your stream to be called. On Twitch, this is in your “Stream Manager”. On Facebook, this is in your “Creator Studio”.
- You are now ready to stream your game. When you are ready to go live, click “Start Streaming” in the bottom right. When you are done, click “Stop Streaming”. Congratulations!
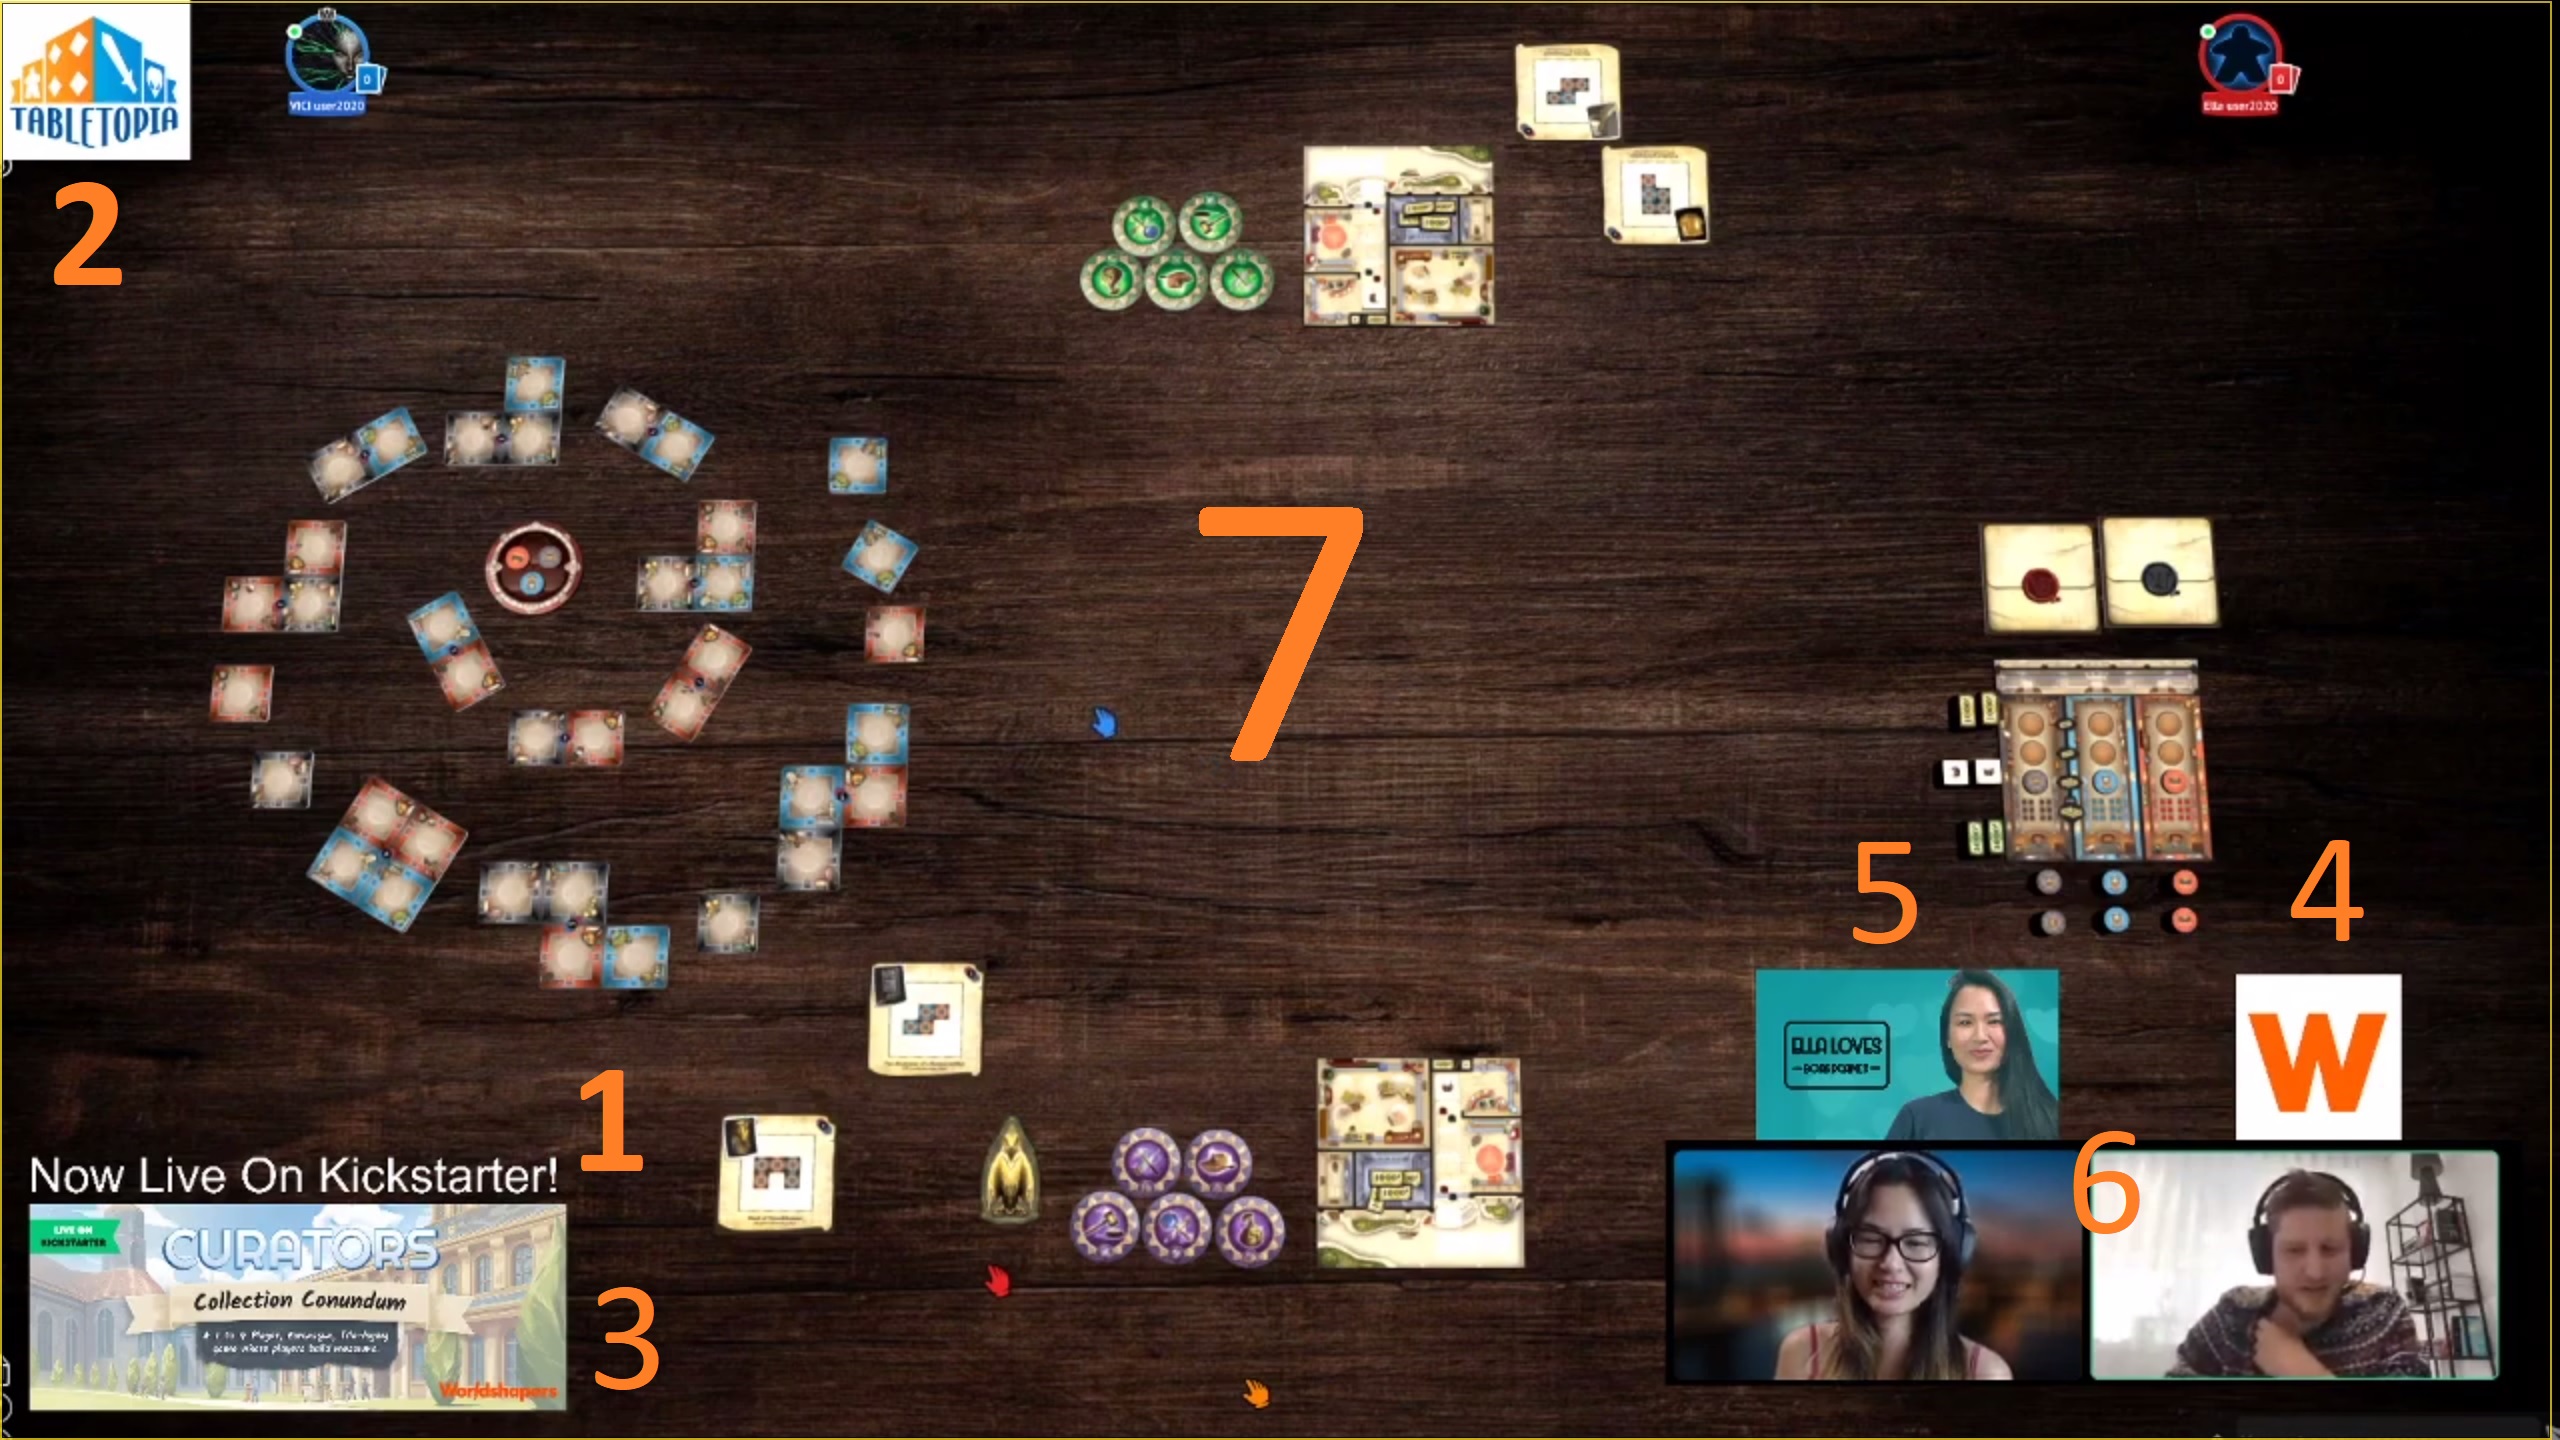
Example Stream and Sources
Tips
- Most platforms have a “connection test” option that lets you stream without going live to make sure it’s working. Twitch uses Inspector, Facebook has “test broadcast” inside their Creator Dashboard.
- It’s best if the browser you’re streaming the game from contains the game as the only tab open. This will prevent you accidentally switching your stream to another window!
- Don’t get paranoid about what people can see when you’re not looking at OBS! If you set your sources, people will ONLY see the windows you set (even if you’re looking at something else). When you’re more confident, this means you can check the live comments or reference something online without worrying that people can’t see the game.
- People are extremely forgiving when it comes to livestreaming, You don’t need to be a perfect video producer with a perfectly curated video! You’re creating an invitation for people to join you and hang out while they experience your game with you. Don’t fret mistakes!
- If you want to expand even wider, services such as Restream.io allow you to simultaneously stream your games to multiple social media networks at once!
Troubleshooting
One of my sources isn’t visible!
Make sure the “eye” symbol on the right side of the source isn’t grayed out (click to toggle). Also, sources display in a layered fashion from the top down (with your source being visible over sources underneath it). Rearrange your sources in case one of them is covering the other by dragging their order in the source list.
I don’t want random people on the internet seeing all my bookmarks while I stream!
Most browsers allow you to hide your bookmark bar. On Chrome and Firefox, press Ctrl+Shift+B (and again to bring it back once you’re finished). You can also hide features you don’t want seen with the crop function (Alt+drag the corner of the red bounding box).
My browser window is just completely black.
The best solution is to download another browser such as Firefox and run your game through there.
However, if you don’t want to or can’t resort to doing that, check some of the tips in this article.
My OBS looks different to yours…
You may have downloaded Streamlabs OBS – this is a different version of OBS that is made by Logitech (however it is based on the same code and original software). Although Streamlabs OBS contains more features, we recommend the other version of OBS because it is less resource-heavy on older computers. However, if you ever move beyond basic streaming and wish to do even more fancy stuff (that’s beyond the scope of this guide), you can always upgrade to Streamlabs OBS later.
Our above instructions should work just as well for Streamlabs OBS (though some buttons may be in different places)!